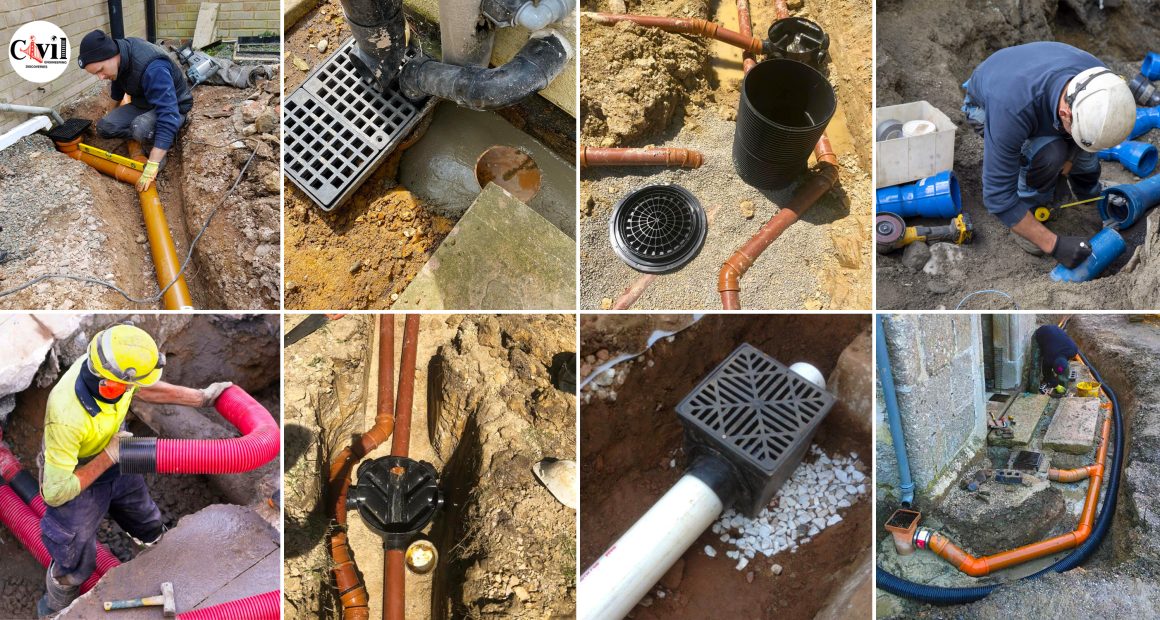
An underground drainage system is obviously a crucial aspect of any property, whether residential or commercial because it protects the property and the surrounding environment.
PVC pipes are the most often installed form of underground drainage pipe. They typically have a push-fit connection, which means they are easily pushed together and do not require solvent cement or other heavy tools to join.
Plan the drainage system:
Before you begin joining pipes, it is critical to adequately plan the system to avoid having to redo any work later on. Usually, an architect or drainage engineer will have some design plans, but if not, you’ll need to sketch out the proposed system, including the position of the pipes, the direction they’ll travel, and where they’ll link to the main system. You should select the appropriate size (pipe diameter) based on the amount of water that will flow through them. It is commonly a 110mm drainage pipe for domestic residences and a 160mm drainage pipe for the main run that connects multiple houses.
It’s also a good idea to have a complete inventory of pieces, including any curves, angles, joiners, junctions, gullies, and so on. Also, before you begin digging your trenches, it’s a good idea to lay out the piping in a way that eliminates the need for abrupt or needless turns, taking into mind any obstacles that may come in the way such as trees, walkways, buildings, or other pipework. You’ll also need to determine the proper “fall” for the pipework, which is the gradual gradient necessary for gravity to carry the water through the pipes.
Ready your tools:
In order to properly connect your pipes you’ll need a few basic tools at the ready such as:
- A hacksaw or a fine-toothed saw
- A measuring tape
- A marker or a pencil
- A rubber mallet
- A chamfering tool
- A trenching shovel
Your materials:
- Underground drainage pipes (in the size you have chosen)
- Any fittings required such as bends, couplers, end caps, junctions, etc
- Pipe lubricant
Dig your trench:
Dig a trench that is at least 410mm wide (for 110mm underground pipes) lined with pea shingle making sure to add at least 300mm of cover over the top of the pipe once it’s in the trench.
Cutting and chamfering the pipes to a length:
After you’ve assembled your equipment and materials and excavated your trench, you can begin measuring and cutting the pipes to length. Mark and cut each piece of pipe needed using a measuring tape, then saw it to the desired size with a clean straight cut. Then, using a chamfer tool or a file, correctly chamfer the end of the pipe and clean the end to eliminate any cutting debris. This will make it easy to connect the pipes while also ensuring that the seals do not become broken and cause leaks.
Connect the Pipes:
Now comes the exciting part: connecting the pipes. To connect two lengths of pipe, you’ll need either a drainage pipe coupler, which is a tiny pipe fitting with two sockets (the sockets are the female ends that receive the plain end/spigot [the male end] of a pipe or a fitting) or a socket that comes on the end of the pipe or fitting. In brief, the male end (spigot, or pipe end) of a pipe or fitting fits into the female end (socket) of a pipe or fitting.
To connect them, apply pipe lubricant to both the rubber seal of the coupler or socket and the chamfered end of the cut pipe or spigot, then push the pipe all the way into the socket to the location within the fitting. If it’s too firm, use a rubber mallet to tap it into position. Repeat this procedure for each length of pipe and each fitting in the system.
Test Your Drainage System:
Before filling the trenches, the system should be tested for leaks. An air or water test can be used to check for leaks. If leaks are discovered, inspect the connections and tighten them as needed. If tightening them does not help, disassemble the joint and inspect the rubber seal for any damage or dirt/grit that may have prevented it from sealing correctly.
Click Here To See 33+ Photos Of Drainage Pipes On The Construction Site That You Have Never Seen!


